
Version 2
Added info on changing points
and vertecies
Version 1
Basic beginnings
The purpose of this introduction is to start people off in car shape
editing using my car shape editor.
when you first run the car shape editor you are presented with the
following screen.
Before you can use the editor you must tell it where to locate your
gp2.exe to do this select
Edit->Edit gp2 location now use the browse window to point it at the
gp2 directory in which
it can fine the gp2.exe
Now you are ready to import your car from gp2.exe first select File->Import
From Exe or use
the toolbar icon.
![]()
when you do this a window will appear with your car in it!
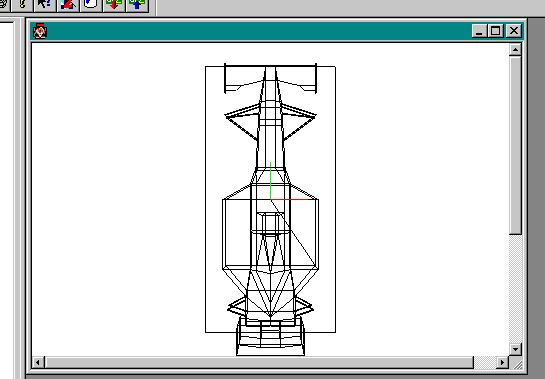
Use the mouse and control keys to rotate the car round to a suitable angle!
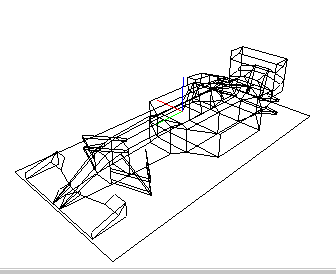
Now you might like to select fill object (paint can) from the toolbar
to make it easier to see!
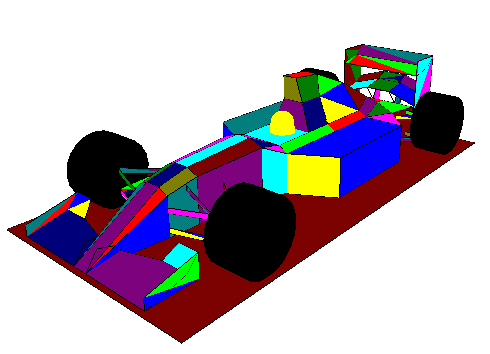
Now your ready to edit your car
firstly open the tree

upto version 0.3 you can still only edit one part of the car and that
is the scaleData but there
is alot of scope here for different car shapes and while you lot play
with that I'll work on getting
the rest editable!
so firstly you should know something there is actually two different
cars! I found editing the
scale data 0 - 31 affect car 1 and 32 -> 62 effect car 2
Benetton, Jordan, some of the others seem to be car 1
Ferrari and some of the others are car 2
so open up the scale data

You can see here that the data from s[31] meaning scale value 31 onwards look very similar to the first car!
ok so let make a change to the data
double click on s[0] 16 you'll get a data entry box like this up!

enter a new value in here 70 will do!
now look at the car

See that! it changes a number of the polygons to be alot wider! its
hard for me to explain what is
going on here but lets just say that all the dimensions of the car
are encoded into 32 numbers
allowing for a symmetrical design to be made in the minimal amount
of disk space, hopefully
in time this may change and we will be able to add more polygons and
more data points
but for now this is a long way off!
Oh! yes now you want to Export it to your exe, be sure you have a backup
now go for a quickrace
and you'll need to use the cameras to see your changes. You notice
the other cars still look normal
from inside the cars well this is becuase of the rcr.jam files hopefully
in time we will get this.
but for now just make some new cars. Cars can be saved out to disk
aswell so you can experiment.
So which Scale values do what!
s[0] is the width of the central portion of the car
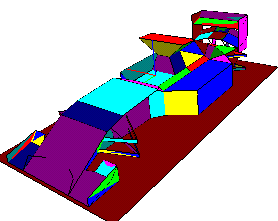
s[1] width of mid front pod plus depth of air intake
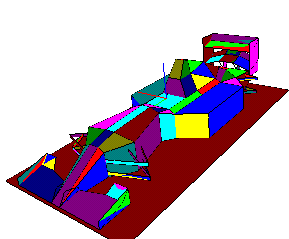
s[2] air intake pod depth
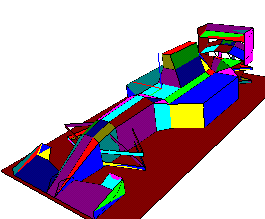
s[3] wing depth

s[5] is width of middle of air intake pod
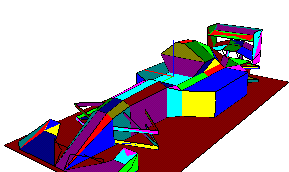
s[7] is the side pod width (man alive!)

Ok so now we want to change sometinh more than the scale value I want
to change some of
the vertex information and some of the point information
Vertex basically are pairs of number that index the point data
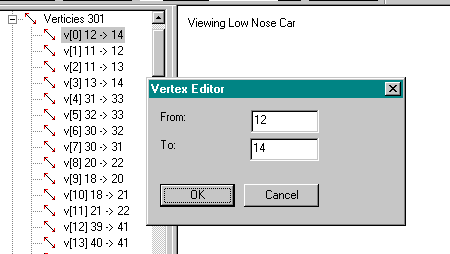
so reading the tree vertex 0 or (v[0]) connect point 12 to point 14
using the
wireframe view and selecting on a vertex shows the vertexup in red
beware
that the polygons use index's into the vertex list in a similar way
to the way
vertex's use the point data so changing one vector could have a major
effect
on textures and basic car shape!
ok lets move onto something more complicated, I've played with the scale
values
and now I want something more interesting how about indivdual points
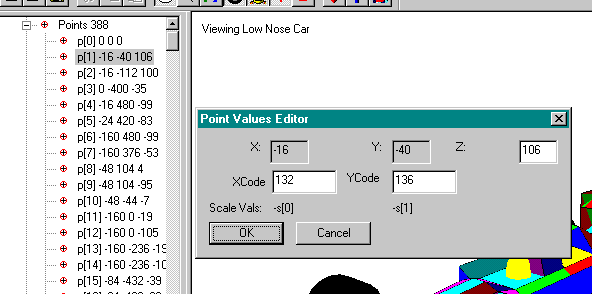
Well there are a fair few points in the car editor some 388 but beware
the first 194 are used for car 1 (low nose cone)
and the next 194 are for car 2 (high nose cone) you should also notice
that were as changing the acale values
usually effects both cars changing the point data only effect one of
the two cars
Double click on a point brings up a dialog box like that shown in the
image. the actual point data for p[1] is
(-16,-40,106) if you look at the image while selecting a point you'll
see a red cross over the point your trying to
edit! so now I want to change the data well nothing is easy in this
game and although I hope to improve this
interface its abit of hand coding for now!
you'll see fomr the box that the X and Y are not directly editable why?
well its becuasec these values have been
derived from the scale data the actualy code in the model is an X value
of 132 (0x84) and Y = 136 (0x88)
believe me when I say that these values are associated with an X value
equals to s[0] (scale value 0) but negative
I'll explain how
firstly this number 132 (0x84) in our case is above 0x80 so its negative
(in gp2 terms) so lets take 132 and subtract 0x80 (128 dec)
this give us 4 (good maths eh!) ok now take this number and subtract
4 now divide by 4 and the anser you get is the
index your using so written down
X = s[index]
where
index = ((XCode-128)-4)/4
or more simply
index = (XCode-132)/4
Do this for 136 and you'll see see what I mean......
136-132/4 = 1
now use the fact that number over 0x80 are -ve and the YCode = -s[1]
looking back at the scaledata
we see the s[1] = 40 so the Y value is -40.........(ping! get it!)
what about the Z well thank fully the Z can be anything!
It's not the end of things
Sometimes the XCode is aboove 0x8000 ......aarrrggghh! how do
I handle this.....
I'll show you with an example
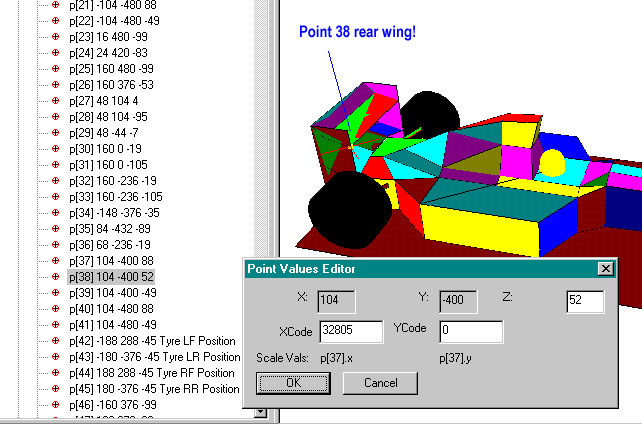
Point 38 is the read wing and for reason probably of speed for geoff
if he only had to work out one 3D point then he
could get away with less calcultions and would have to store less data.
so if geoff had already calculated am X,Y pait
that he wanted to use again instead of putting in the original code
he puts in a code that points to the original point
these values are signified by values over 32768 (0x8000) so in
point 38 it says use the x and y values from point 37
but use my own Z value (thankfully!)
I'll try in the near future to allow you to do this abit easier than
it is now but here goes for the time begin.....
so how do I know this mean use the point 37 well I said it is values
over 0x8000 well they start at 0x8001
and this mean use the first point in the pointData structure.
so X = p[index].x Y= p[index].y
where index = XCode-32768 in our example
32805 - 32768 = 37
hence X and Y are use point p[37]
Now most of the time YCode is 0 and I haven't seen a YCode of non zero
but then I haven't looked, the car shape editor
ignores it but that doesn't mean gp2 does. if anyone has seen a value
with something other than 0 in let me know!
Ok this should get you more than some way into the car shape editing problem
I should also warn you of another thing
I think that the helmet location is defined by p[63] and the tyres
by p[42], p[43], p[44], p[45]
of course add 194 to all those values to get the locations in the high
nose car!
ok! I've hit abit of a wall with regard to
finding the textures mapping from the
2D jam to the 3D polygons, so while
I continue to look I though you could
help me out.
I've put a new version of the car shape
editor onto my site
http://www.volftp.tin.it/GP2/trackedit/careditor0.7_texture.zip
and you'll see that this contains a texture.cfg file
opening up this file you'll see the following data
-------------------------------------cut---------------
/ This is the texture configuration file it's format is
// index,x1,y1,x2,y2,x3,y3,x4,y4
// it maps the 2D Jam file to the 3D polygons
// by editing this file you can help me determine
// the mapping of textures onto polygons to
// a help the development effort
// allowing me to concentrate on add additional editing
// functionality to the Car Shape Editor
// first 0 and 1 are wheel location definition so they can be ignored
2,188,114,134,114,134,97,188,97
// this will map the whole jam onto polygon 3
3,0,164,256,164,256,0,0,0
-------------------------------------cut---------------
Now if you have a texture map capable openGL library
if you run this car editor and import your car you'll
see that 2 of the polygons are mapped with textures
the rest remain yellow!
now by editing the texture.cfg file using a text editor
you can fill in the mapping between the jam file
and the 3D model. I know this isn't idea but
it should only be 194 polygons that need to be
done, and for that we car gonna get the best 3D
carset viewer we have had! In the meantime when
my machine is fixed I'll add the ability to import
the jam files from the game so we can use this
as a way of viewing the all the cars! not just
the ferrari!
take a look at the following to get an idea of what
is going on
http://www.volftp.tin.it/GP2/trackedit/texture1.gif

this should me mapping the whole of the jam file
(256x164 pixels) onto the side pod! using the following
line!
2,0,164,256,164,256,0,0,0
2 at the front being the index in the tree of the polygon
I want to map it to, in this case the side pod!
the following after that are the 2D coordinates on
the jam that get mapped to each vertex!
its impotant to note that the polygons have an order
in which they are created sometimes clock wise sometimes
anti clock wise and this is the order in which you
must specify the 2D coordinate so given a square
a------b
| |
| |
c------d
it doesn't follow that we will always want to specify
it as (a b c d) in fact if you explode the vertex box
in the editor you will see side pod 2 consists of a polygon
with verticies -1 -2 3 4 from the tutorial we know
that the -ve number mean go the other direction!
so we need to select vetex 1 2 3 4 in turn....
did you see the way round the polygon the highlighted
line travelled yes bottom - left - top - right
now the polygon is defined by the beginning point
of the vertex!
so out 2D order would be d c a b
hence our correct line for polgon 2 is
id x1 y1 x2 y2 x3 y3 x4 y4
2,188,114,134,114,134,97,188,97
http://www.volftp.tin.it/GP2/trackedit/texture2.gif

At the moment it only handles polygons of 4 verticies
and you'll notice not all polygons seem to have an
actual polygon some are commands that say things like
put a wheel here or a helment here!
So do you want to help well if you do then do one
at a time and then mail it to me I'll try to keep
an upto date list and post it to the forum as often
as possible also I would be grate full if people would
label the polygons they do with comments telling
people where this it is on the car!
Together we should have a very good car!
I suggest only doing the numbers below 194
to begin with because we could well fine the
others are simply a repear! with only a few
minor alterations!
Get the latest cfg file
http://www.volftp.tin.it/GP2/trackedit/carshape/texture.cfg
Many thanks
Paul Hoad
Paul Hoad